
In yesterday’s post, we took a quick look at professional and do-it-yourself (DIY) options for winterizing your irrigation systems, with a deeper focus on choosing the right equipment for the job. Today, we’ll take a walk through the process of winterizing, once you have all your equipment—including an appropriately sized air compressor—in place.
JodiJacobson / E+ / Getty Images
Shut Off the Water Supply
To get the ball rolling on the project, make sure you’ve got the water supply turned off. Depending on how your system was designed and installed, the on/off valve could be located in one of many locations: in an outbuilding, a basement, a crawl space, or an underground valve box. For another example, the irrigation system controls at our office are housed in an indoor closet near the building entrance.
In some instances, there will be another stop and waste valve located underground, possibly up to 5 feet below surface level. If that’s the case, there should be a special long key that will allow you to close the valve. If you feel like you have to force the valve shut, stop and call a service technician to assist.
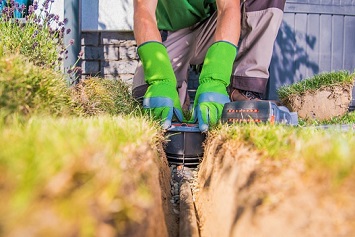
Address Pump and Backflow Devices
Not all systems require these components, but if your system has them, it’s vital that these be taken care of ahead of freezing temperatures.
Should your system have a pump, be sure to drain it, and if possible, remove it from the system and bring it indoors. If the pump is not removable, drain it and then wrap it with insulation to protect it from the cold.
Backflow devices are required for any irrigation system that utilizes the same water supply as the rest of the building. While this is often the case for a residential system, commercial systems may be connected to their own water source.
There are a few different types of backflow devices, with each requiring a different process for winterizing:
- Atmospheric Vacuum Breaker (AVB): AVB devices are installed downstream from each zone control valve and are winterized when the zone it controls is blown out. While they’re the easiest of the backflow devices to winterize, it is not legal to install them in every water district. If you have questions about what kinds of devices are usable in your area, reach out to your local water authority or planning/building/zoning office.
- Pressure Vacuum Breaker (PVB) or Reduced Pressure (RP): These devices are much more sensitive than their AVB counterparts. Therefore, they should never, under any circumstances, be blown out. The internal components of PVB/RP devices are likely to melt (especially the rubber seals) due to the friction caused by compressed air moving through them. Therefore, they need to be drained. The process is a little different depending on your setup. There are a number of helpful how-to videos on YouTube that show how the different backflow preventers work and the best way to service them.
Another option would be to drain your backflow device and remove it from the system for storage over the winter.
welcomia / iStock / Getty Images Plus / Getty Images
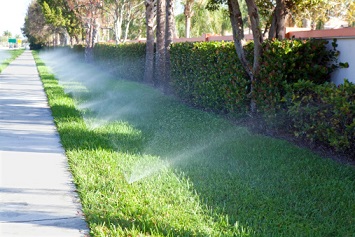
Blowing Out the Irrigation System
With the upstream components drained and removed (or at least protected), it’s time to get the water out of the system. You’ll want to blow out each zone individually, so be sure to only open one valve at a time. Typically, it’s best to start the process with the last line in the system, or the valve controlling the water flow to the highest elevation. As these pipes tend to run the farthest from the water source, they tend to take longer to blow out, with the process speeding up for each additional line you service.
During the process, you need to keep a close eye on the pounds per square inch (psi) output from the air compressor and, if you can, the temperature of the air it’s putting out. If the air temperature is too hot, or if you see the temperature increasing, adding an additional length of hose should help cool the air down before it damages your system.
It’s also important to run the compressor only as long as it takes to effectively blow out the water. Once the water stops coming out of the sprinkler heads, shut the compressor down immediately to prevent any damage to the line.
Once the first line is done, close the valve and move to the next one in the system. Don’t forget to move the air compressor to the next line or to open the next valve. Missing these steps could create a bigger headache.
For the best results, you’ll want to repeat the entire process for each line. This will help get rid of any residual water left in the pipes or sprinkler heads. Also, it’s better to have two shorter blowout cycles than one long one, as the friction from dry air moving through the pipes could damage them. Keep two things in mind, though: Never run the air compressor longer than needed, and never run the compressor with all the valves closed, unless you’d like to risk a catastrophic system failure.